Pages

Showing posts with label Problem Solving. Show all posts

Thursday, February 26, 2015

TBT: Large Group Toy Matching Game


For today's Throw Back Thursday post, I wanted to show you how I took the Toy Matching Game I shared a while back to the next level, and made it possible to use it for group play. Here's the original set-up:
A single sheet of paper, and a few toys. This is perfect for one child to play with, but not so great when you've got a half a dozen kids at your house for a play date. So, how do you make this work for a larger group? 
 We had children ages 2-10 coming to play, so I wanted this to be fun for as many of them as possible. The night before everyone came, I went through the kids' toy boxes and picked out all the toys I could find that would be fairly simple to trace, while still presenting a challenge. I especially tried to find pairs of things that were of similar shape, but not identical. For example, a toy hammer with a long skinny handle and one with a short fat handle, or a five pointed star and a six pointed star, etc.
Once I gathered the toys, I spread a sheet of paper (I used the back side of some leftover Christmas wrapping paper, but craft paper would work great too) across my coffee table and used painters tape to attach it all the way around. Then I laid out all the toys and traced them onto the paper.
When our friends started arriving this is what they found waiting for them:
I didn't give any instruction, just let them do with it as they pleased. This worked great as a way to keep kids busy while we waited for everyone to get here. It was fun to watch the kids work on figuring out where everything went. There was enough room that 4-6 kids could each work independently in their own little area, but most of them chose to work together in small teams or groups. 
So what if you don't have a large surface that would work for this? Or what if you're going to have more kids than will fit around a single table?
One other idea I toyed with when planning this activity was to make a bunch of individual papers so that each kid had their own to work on (like individual bingo cards). I think this would have worked out okay, but I think it would have kept the kids from joining forces to figure out the puzzle together. If that's the best you can do in your situation I'm sure the kiddos will still have fun. 

Monday, January 5, 2015

Candy Cane Can Stilts

So you remember our candy cane striped tape resist art? 
Remember I said I wanted it for another project? Well, today is the day you get to see my favorite of all our Christmas activities. We made can stilts! I was sitting looking at the growing stack of infant formula cans that was piling up in my kitchen and all the sudden I remembered this activity and knew these would be perfect. I used a nail to poke two holes in each can (one hole on each side of the can) then ran a length of string through the holes. Tie the ends of the strings together to make loops and there you go!
 Now, to be honest, this may have been a bit above Erik's ability level, but he has been determined to figure these things out. I've never seen him work so hard at something before! It's been impressive to watch his tenacity as he figures out how to balance, coordinate hand and foot movements, and just have fun.
I do think I got the strings a bit too short, they probably should come up to about his waist, but they work well enough for us.

Monday, May 12, 2014

Toy Matching Game

So you may or may not remember Erik's cousin Wyler that we met a while back through this post. Well, this week is going to be Wyler Week, and I'll be featuring a couple of activities that his mom Carolyn put together for him. These are things I've been wanting to try with Erik and just haven't gotten around to doing, so I'm super excited to see someone enjoying them. 

Here's what Carolyn had to say:

This was inspired by some matching activities that other moms set up for their kids on a Montessori Facebook group I'm in.
I gathered up a handful of toys and traced them on a sheet of computer paper, then went over the lines in permanent ink so they would be easily visible.  I called Wyler in to check it out, and showed him how all they toys had a matching outline.  He caught on pretty quickly and had everything nicely matched.  He pulled everything off and did it again.  Only his hammer got turned around.  It was backwards according to the outline. 
He started to rotate it in different directions, but didn't realize he needed to flip it.  After a couple tries I flipped it for him, though he probably would have figured it out pretty quick. 
 I have it set up on a tray (cookie sheet) on a book shelf so he can go back to it when he wants.


Friday, November 15, 2013

Goin' Fishin'

I realized the other day that I never posted one of the activities we made while we were staying with my parents this summer. It was pretty easy to throw together, and is a lot of fun!
This is just your classic fishing game, the inspiration for which came from here. Mine are not anywhere near as adorable as hers, especially my fishing rod (hers is awesome), but they get the job done. For the fish I just cut a fish shape out of different colors of felt, and jazzed them up a bit with puff paint. To make them magnetic I put a roll of wire in the mouth of each fish. Honestly, I can't give you any more detail about what kind of wire it was, it was just something I found laying around.

For the fishing rod I tied a piece of yarn around the end of a dowel rod and hot glued a magnet to the end of the string. Easy Peasy! Depending on whether Erik felt like sitting or standing, sometimes the string was too long, so we just twisted it around the end of the rod and it worked great. I liked having a bit of extra length on there to give us more options for where to play with this. 
This activity takes some practice when you first get started. We haven't played with it in months, and so today when I pulled it out it was like it was brand new again. Erik struggled to control where his "fish hook" was swinging, but he eventually got the hang of it and we sat and fished on the living room floor for quite a while. It really was a lot of fun! This is a great way to work on hand/eye coordination, talk about colors, and kill some time while you're waiting for your laundry to finish. :)


Thursday, March 28, 2013

Searching for Buried Treasure

I found this idea on a list of baby games on sparkpeople. My immediate reaction is that it's genius! So simple and yet so much fun. And, as you may have noticed if you've seen my last few posts, you can stretch it out and turn it into several different activities. We started with our bowl of wadded paper from our previous bit of fun. Paisley would've been content to just keep playing with the paper. 
We went ahead and took this game to the next level and added a toy (a stuffed monkey) to the mix. I showed her the toy and then buried it in the bowl of paper. She was not real happy about it disappearing and wanted it back. She dove right in after it. 

There it is!
As soon as Paisley got the monkey out of there, she started smothering the thing with hugs and kisses. It was really cute!
"Oh Mr. Monkey, I love you so much. *kiss kiss* I will never let that mean lady bury you in there again *kiss kiss kiss*"

Friday, February 22, 2013

Guessing Game


The idea for this activity came from Productive Parenting, which is really an awesome website (and they didn't even have to pay me to get me to say it). 
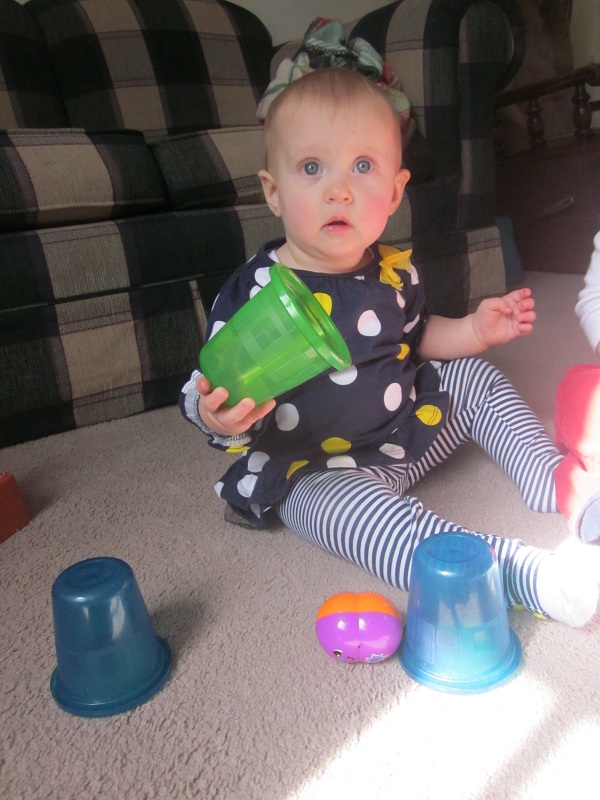
 This all seems pretty obvious, but just in case... All you need are a few cups or bowls that are small enough for your child to manipulate and a small toy. You hide the toy under a container and baby has to figure out where it is.
Paisley got to work on fine motor skills and problem solving with this one. She did pretty good too!
Was this supposed to be this easy?
 Paisley and Erik both enjoyed this one for a little while, and then they just wanted to play with the cups. Erik started stacking them and experimenting to see what other toys fit inside. Paisley was mostly interested in trying to drink out of them. What a super easy way to keep babies entertained!

Monday, February 18, 2013

Chunky Lacing Activity

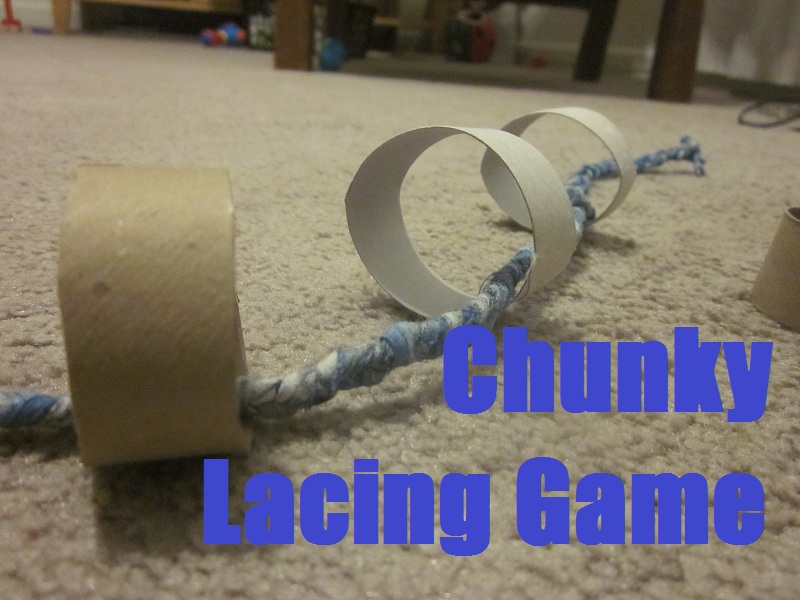
The idea for this little game came from "What do we do all day?", and it was a hit with everyone. It was super easy to put together, and I didn't pay a dime for the supplies. I was looking for a new way to help Erik build his fine motor skills, and this seemed perfect. 
I had saved the rolls from our TP Mush, so it was the work of a few seconds to cut them into rings. I didn't have any wide ribbon handy like in the original post and I wanted something that would be thick enough that it was easy for him to handle. I took some scrap fabric, tore off three strips and braided them together. Then I tied a knot in each end and we were ready to go. I demonstrated what to do, and Erik took over from there. He had a blast threading the rings on there and played with it for quite a while. It was really fun to watch him go at it!
We did have to be very careful not to let Paisley get a hold of the cardboard rings. They dissolve pretty quickly in a slobbery mouth and can be a serious choking hazard.

Monday, December 10, 2012

Piggy Bank Play

I want to welcome my first ever guest poster, Carolyn. She blogs over at Carolyn's Cozy Corner and Cookies 'n' Cows. Carolyn's little guy Wyler is just a few weeks younger than Erik, so they are often doing and learning the same things at the same time. When she sent me this idea for an activity to do with Erik I invited her to share her experience with Wyler. Here's what she had to say:

I wanted to share something I discovered with Wyler that Erik might enjoy. From reading your Playing to Learn blog this would work on fine motor skills and hand eye coordination. I was putting spare change in Wyler's piggy bank and he came over to see what I was doing. So I emptied out all the change (thanks to Grandma Darla there was about $2 in dimes and a small (really small) hand full of random change I have added.) He picked up a coin and tried to put it in the slot. The coin didn't fit with the way the slot in the bank was oriented, so I turned the bank and after that he was hooked. (If I had left the bank where it was he would have had problem solving skills as he tried to figure out how to get that coin in.)
 Once all the coins were in he picked it up, and shook it. Nothing came out! He handed it to me so I could take the coins back out, and once they were dumped he put them right back in. This happened anther time or two. He wanted to keep playing, but I had a few other things I needed to do, and couldn't supervise this activity all day long.

I think this sounds like a great activity. As you know, I'm a big fan of taking things you've already got around the house and turning them into a playing/learning activity. I can't wait to try this one out with Erik!

Thursday, December 6, 2012

Surprise on a String

This activity sounded like it would be pretty fun, and required very little set up, so we went for it. The gist of it is that you take a few toys, tie each one to its own piece of string, attach the string to baby's highchair tray, and then they have to pull the toy up on the tray to play with it. In practice it just wasn't working out. I used tape to attach the strings to the highchair tray, but instead of pulling up the toys, Erik just pulled the tape off his tray and dropped the toy, string and all, without ever even trying to pull on it. He just wanted a snack, after all he was in his highchair! 
So, we made a few adjustments to the idea and it became a hit. As you can see in the pictures below, we tied the toys to the back of a chair and then Erik sat on the seat and pulled the toys up. It worked out pretty well. This activity is a great way to help your child develop problem solving skills, hand-eye coordination, and work on those arm muscles. 
 We did discover that the longer the string is the harder it is to get the toy up and over the back of the chair. Erik just couldn't quite figure out how to pull it hand over hand to get that toy.

 I shortened the strings and things went much better. That is until Erik noticed the empty box in the room. Don't you love how something as simple as a cardboard box can trump any cool activity you try to put together? He was never this excited about the toys on the strings.