Erik had a hard time figuring out how to hold the clothes pin without squeezing it open so the cotton balls fall out. At first I was a bit discouraged and thought it wasn't going to work, but then I realized how good it was for him to have to work on controlling his little hands more carefully. Erik painted for a long time and had a wonderful time! As always, it eventually ended up in a finger painting extravaganza, but I really do think he stuck it out with the clothes pins for a lot longer than he normally does with a brush.
Monday, February 10, 2014
Clothes Pin Painting
Inspired by this blog post, we decided to try some clothes pin painting. The original blogger used pom poms, but instead of digging out my thing of pom poms, I just grabbed a few cotton balls out of the cupboard. Set up was a breeze. Pinch a cotton ball in each clothes pin. Set out the paints and the paper, and turn your kid loose.
Friday, February 7, 2014
Edible Glossy Paint
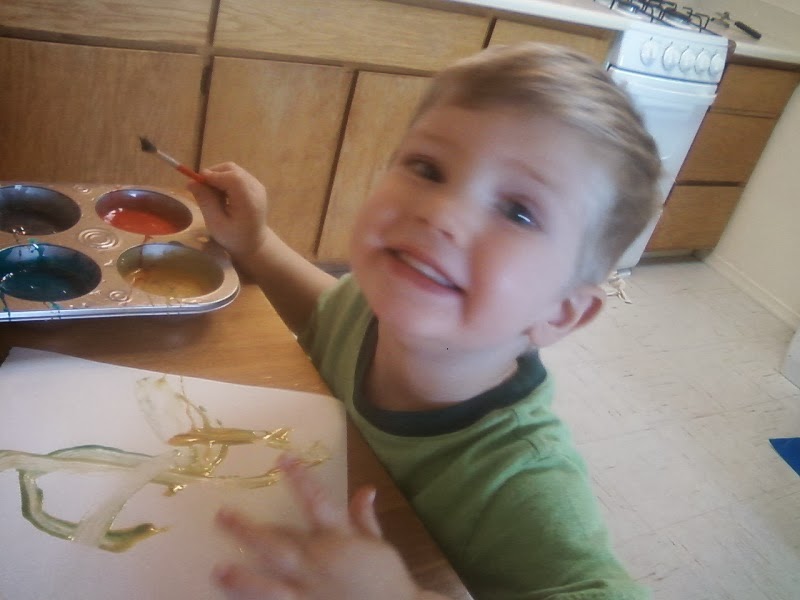
This little art project was a lot of fun. Erik loves to paint, and is always super excited when we do so. I've had this activity pinned for a long time now, but the other day we finally decided to go for it. I dug around in my pantry and found a can of sweetened condensed milk (which happened to have expired and so it really wasn't at all wasteful to put it to good use here) and my box of food coloring. It only took a few seconds to divide the milk into a muffin tin, stir in some food coloring, and turn Erik loose. He started out using a paintbrush and it was fun to watch him swirl the colors together. The paint is really vibrant and shiny, so it's really very visually appealing, if somewhat sticky.
Yeah, ummm sorry about the bad pictures, I couldn't find my camera and had to use my phone. Oh well, you can get the gist of what's going on.It wasn't too horribly long before Erik was literally up to his elbows in paint. He loves finger painting, and it's a challenge to get him to use any kind of brush for very long. I'm okay with that though, this is more about him enjoying some freedom and creativity than it is about staying clean or doing things a certain way.
We really liked the way this paint looked, but I didn't like the way it dried. It was still a bit sticky even after it had dried for a few days (and where Erik had really heaped the paint on it still wasn't dry after two or three days), so I was hesitant to keep the final art pieces around. We hung them up on the fridge for a day or two, but then they "disappeared", never to be seen again.
Would we do this again? Probably. It was cheap (especially since I would probably have just thrown away the expired milk anyways), very visually appealing, and required little prep work. Maybe next time I'll try to help Erik keep from laying the paint on too thick though so that maybe we can keep one or two of the finished pieces.
Monday, February 3, 2014
Field Trip: Belen Rail Yard/ Train Station
One of Erik's obsessions right now is trains. He LOVES them! Just about anywhere we drive around here we see railroad tracks. We can hear the train whistles from our house. One of our favorite weekend activities is riding the local commuter train up to Albuquerque and seeing the sights up there. And when he can't talk us into taking him on the train for a ride, he will happily settle for going and sitting at the train station or near the rail yard to just sit and watch the trains go by.
It's really fun to take few moments to go and explore Erik's interests together. We talk about what kinds of cars the trains are pulling, and what the cargo is that they are carrying. We count how many engines are on each train. When traffic is slow we watch the pigeons flying around or watch the railroad employees going about their work and talk about what their doing.This is such a simple thing, and is completely free, but I feel like Erik gets so much out of it. What a fun way to spend a few minutes together and build vocabulary and other skills at the same time!
Friday, January 31, 2014
Cardboard Creations
As I'm sure I've mentioned before, I am all over anything that is cheap (free is even better!!!) and will keep my little guy busy for a few minutes. Here are a few things I've thrown together in the last few months to keep Erik entertained and out of my hair. It doesn't hurt that they help to encourage independent play and imagination either!
We made this one not too long after we moved, out of one of the MANY boxes we had laying around. I'm particularly proud of the fact that the steering wheel turns, so it's even more like driving a real car. To make that bit of magic happen, I cut out two circles from another piece of cardboard; a bigger one for the steering wheel, and a smaller one for a hood ornament. Then I poked holes in the center of each and used a long twist tie to connect the two through a hole in the box (I just used the hole already cut into the box for a handle, but you could cut a small hole out of the side of a box with no handles). Draw whatever details you want with a permanent marker, and tada! We pulled out our colored pencils and colored the car, but that is completely up to you and your kiddo.
This creation is technically not made out of cardboard, but it could've been (and it looks like it is since it's made out of brown craft paper) so I'm throwing it in here. I needed Erik to keep himself occupied for a few minutes one day and I was feeling frustrated that I couldn't seem to get him interested in his toys. I started lamenting the fact that he doesn't have anything fun to go with his collection of toy cars, and wishing I had the supplies on hand to make one of these. Then I realized I had a brand new roll of craft paper from the dollar store, so I grabbed a marker and threw this together. I realized as I was drawing it that the paper was too flimsy to last for very long, so I pulled out my roll of contact paper (I'm seriously falling in love with that stuff!!!) and put a layer of that over the paper. I had to use packing tape around the edges to make them stay down (remember contact paper doesn't like cardboard type surfaces?) but several weeks later our DIY road mat is still alive and kicking.
We made this one not too long after we moved, out of one of the MANY boxes we had laying around. I'm particularly proud of the fact that the steering wheel turns, so it's even more like driving a real car. To make that bit of magic happen, I cut out two circles from another piece of cardboard; a bigger one for the steering wheel, and a smaller one for a hood ornament. Then I poked holes in the center of each and used a long twist tie to connect the two through a hole in the box (I just used the hole already cut into the box for a handle, but you could cut a small hole out of the side of a box with no handles). Draw whatever details you want with a permanent marker, and tada! We pulled out our colored pencils and colored the car, but that is completely up to you and your kiddo.
This one was created after Erik got a set of dishes and play food from his Grandma for Christmas. I hope someday to make a more permanent version of it (with this as my inspiration) but for now this is all I've gotten around to. It's great because he can store his toys in the box when he's not playing with them, but he also has a stove to cook on. The box I used had stuff printed on the cardboard, so I drew my stove-top on a piece of craft paper from the dollar store and then used contact paper and packing tape to attach it to the bottom of the box. (It turns out contact paper doesn't like cardboard, so the packing tape was required to get it to stick on at all)
This creation is technically not made out of cardboard, but it could've been (and it looks like it is since it's made out of brown craft paper) so I'm throwing it in here. I needed Erik to keep himself occupied for a few minutes one day and I was feeling frustrated that I couldn't seem to get him interested in his toys. I started lamenting the fact that he doesn't have anything fun to go with his collection of toy cars, and wishing I had the supplies on hand to make one of these. Then I realized I had a brand new roll of craft paper from the dollar store, so I grabbed a marker and threw this together. I realized as I was drawing it that the paper was too flimsy to last for very long, so I pulled out my roll of contact paper (I'm seriously falling in love with that stuff!!!) and put a layer of that over the paper. I had to use packing tape around the edges to make them stay down (remember contact paper doesn't like cardboard type surfaces?) but several weeks later our DIY road mat is still alive and kicking.
Tuesday, January 28, 2014
Sticky Wall Adventures
I recently revisited and revamped one of our oldies but goodies, and I wanted to share it with you. I took the idea of the Sticky Story Board and combined it with an idea I'd seen making the rounds on Pinterest. It seemed simple enough; put your contact paper up on the window or wall (sticky side out) and then stick pom poms on it. I got everything all set up and plunked Erik down in front of the "sticky wall" (as we've taken to calling it) with a bowl of pom poms and let him figure out what to do with them. He immediately started sticking pom poms to the wall and thought it was great fun. But then the pom poms all started jumping off the wall. :( I don't know if it was the fact that my contact paper is getting old, or if there's something wrong with the cheap dollar store pom poms I bought, but those darn things wouldn't stick for more than a few seconds.
Luckily Erik was still entertained for a few minutes at least. He even dug out his little tongs and tried using those to put the pom poms on the wall. He gave up after just a couple of minutes, and I never did get him interested in putting the pom poms on the wall again, even though I left them available for a few days.
Unwilling to let the sticky wall go to waste, I pulled out my foam sheets from my stash and cut out some shapes to stick to the wall. I also pulled the contact paper up from the wall and drew on a few details with a marker on the back side of the paper. Here's what we ended up with:
Luckily Erik was still entertained for a few minutes at least. He even dug out his little tongs and tried using those to put the pom poms on the wall. He gave up after just a couple of minutes, and I never did get him interested in putting the pom poms on the wall again, even though I left them available for a few days.
Unwilling to let the sticky wall go to waste, I pulled out my foam sheets from my stash and cut out some shapes to stick to the wall. I also pulled the contact paper up from the wall and drew on a few details with a marker on the back side of the paper. Here's what we ended up with:
Erik loved this! I purposely made each train car a different shape and color than all the rest. We got to work on expanding his vocabulary by talking about the different kinds of cars, as well as the different colors. It was a couple of weeks before he finally lost interest and the contact paper lost its stick and had to be thrown away. Next time maybe we'll do a road with cars and trucks to drive on it. Or maybe a zoo with different animal silhouettes. Or boats on the ocean. Or anything else we can dream up and that he seems to be interested in.
Tuesday, January 14, 2014
Play Dough
After letting Erik attempt using scissors for the first time while we were at Explora, I realized that we need to do more work on his fine motor skills/strength. One of the BEST ways to do this is to play with play dough. We made up a batch of dough (and I do mean WE, let your little one help with the whole process!) and pulled out some toys and I let him go to town with it. He poked it and squeezed it and cut it with different toys/cookie cutters. He rolled it between his hands and made lots of little "snakes". He played and played until it was time to put it away and eat lunch, and has loved it just as much each time I've pulled it out since then too.
As you can see, this was around Christmas time and he was a bit obsessed with the baby Jesus from his nativity scene. It was his idea to bring baby Jesus over for his play dough ginger bread man to "worship". Seriously, this was entirely his own idea. We haven't done anything like this before, but he just really thought that the Christ-child deserved a little gingerbread man love. The Baby got lots of gooey play dough kisses before the day was over, but don't worry, Erik made sure Mary was nearby to closely supervise the whole thing.
Tuesday, January 7, 2014
Field Trip: Explora
To my surprise, Erik loved Explora more than he's loved any other place in his life. I've never seen him so engaged in anything for such a long time. He was fascinated by all the interesting things around him and actually played and explored clear through his whole nap time without every acting tired in the slightest. We've been back several times now, and it has yet to fail to hold the same fascination for all of us. I won't even try to show you all the neat exhibits and activities, here's just a few shots to give you an idea of what this place is like.
![]() |
| Exploring the effect of slope on the trajectory of a moving object. |
![]() |
| Animating a movie with Aunt Abby. |
![]() |
| One of the most beloved areas, TRAINS! |
![]() |
| Drawing circles with Daddy. |
![]() |
| Another favorite; giant bubbles! |
![]() |
| Exploring electricity. |
*Nobody paid me to write this, I just really love this place and thought I'd let others know it's out there.
Subscribe to:
Posts (Atom)